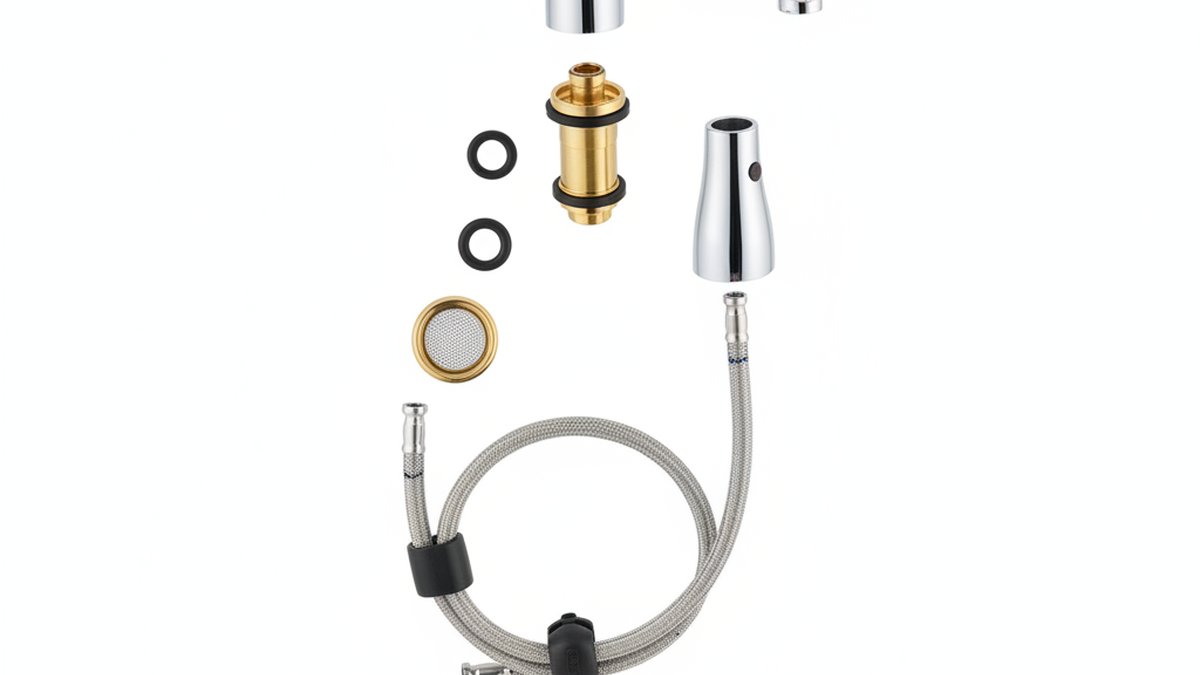
Kitchen faucet parts replacement is the smart first move whenever your faucet acts up, because a single $8 cartridge or a 50-cent O-ring is what fails 90% of the time — not the faucet body itself. The heavy brass or stainless housing usually outlives everything inside it. So before you spend $150–$400 on a new faucet plus install, it’s worth spending 20 minutes figuring out which internal part actually wore out. This guide walks you through identifying the failed part by its symptom, what each replacement costs, how hard the swap is, and when replacing the whole unit really is the better call.
Which Kitchen Faucet Part Do I Need to Replace Based on My Symptom?
Match the symptom to the part first — that’s the whole game. A faucet that drips from the spout when it’s fully off almost always needs a new cartridge or, on older two-handle faucets, new seats and springs. A leak from the base of the spout or around the handle points to worn O-rings. Weak or splashy flow means a clogged aerator. A spray head that stops retracting is a stretched hose/weight, and a stream that won’t switch to spray is a bad diverter.
Here’s the fast lookup so you’re not guessing:
| Symptom | Most Likely Part | Typical Cost | Difficulty |
|---|---|---|---|
| Drips from spout when handle is fully off | Cartridge (or seats & springs) | $8–$40 | Easy–Medium |
| Leak at handle base / spout swivel | O-rings | $3–$12 | Easy |
| Weak, sputtering, or splashy flow | Aerator | $5–$15 | Very easy |
| Handle turns loose / spins freely | Handle set screw or cartridge stem | $0–$40 | Very easy |
| Spray wand won’t retract into spout | Hose weight / quick-connect hose | $10–$30 | Medium |
| Water comes from spout AND spray at once | Diverter valve | $8–$20 | Medium |
| Puddle in the cabinet under the sink | Supply line or hose connection | $8–$25 | Easy |
Nail the diagnosis and the rest is just turning a wrench. If the leak is showing up under the sink rather than at the faucet itself, start with the flexible lines — our guide on what a faucet supply line under sink is and which one to buy will tell you whether the fitting or the braided hose is the culprit before you disassemble anything up top.
How Do I Replace a Leaking Kitchen Faucet Cartridge Myself?
You replace a cartridge by shutting off the water, pulling the handle, extracting the old cartridge, and dropping in an identical new one — usually a 20–30 minute job with a single hex key and an adjustable wrench. The cartridge is the heart of a single-handle faucet: it’s the valve that mixes hot and cold and shuts the water off. When it wears, you get drips, stiff handle motion, or hot-and-cold that won’t blend right.
The steps are the same across most brands:
- Shut off both angle stops under the sink and open the faucet to release pressure. Plug the drain so no screws vanish.
- Remove the handle. There’s usually a hidden set screw under a decorative cap or on the collar — a 2.5mm or 3mm hex key handles most of them.
- Unthread the retaining nut or clip. Some cartridges are held by a brass nut you loosen with a wrench; others use a horizontal pin or a plastic clip you pull with pliers.
- Pull the old cartridge straight up. If it’s stuck from mineral scale, a cartridge puller (or gentle rocking with pliers) frees it.
- Match it exactly and seat the new one in the same orientation — most have a keyed tab so hot and cold land on the right side. Lubricate the new O-rings with plumber’s silicone grease.
- Reassemble, turn the water on slowly, and test hot, cold, and full-off.
The single most important step is buying the right cartridge. Faucets are brand- and often model-specific — a Moen 1255, a Delta ceramic stem, and a Kohler cartridge are not interchangeable. Find your model number (etched under the spout, on the original box, or in the manual) before you order. If your complaint is really just a handle that feels loose rather than a drip, you may not need a cartridge at all — walk through why a kitchen faucet knob goes loose and how to tighten it in about 10 minutes first, since that’s often a 30-second set-screw fix.
What Parts Fail Most Often, and Which Are Cheapest to Fix?
The cheapest, most common fixes are aerators and O-rings — often under $10 — and they solve the two complaints people mistake for a “dying faucet”: weak flow and minor leaks. Cartridges are the next tier up in both cost and effort, and full spray-head/hose assemblies are the priciest DIY part. Here’s how the common parts stack up.
| Part | What It Does | Fails Because | Replace Cost |
|---|---|---|---|
| Aerator | Screens debris, shapes the stream, saves water | Mineral scale & grit clog the mesh | $5–$15 |
| O-rings / seals | Seal the spout base and stem | Rubber dries, cracks, flattens with age | $3–$12 |
| Cartridge / valve | Mixes and shuts off water | Ceramic discs wear or scale up | $8–$40 |
| Diverter valve | Routes water to stream or spray | Debris jams it; spring weakens | $8–$20 |
| Pull-down hose & weight | Extends and retracts the spray wand | Hose kinks; weight slips; quick-connect leaks | $10–$30 |
| Spray head / wand | Delivers stream & spray at the nozzle | Nozzle rubber clogs; button sticks | $15–$45 |
A quick note on aerators, because they’re the fix people overlook: if your once-strong faucet now sputters or sprays sideways, unscrew the aerator, soak it in white vinegar for an hour to dissolve the calcium, rinse, and reinstall. If it’s corroded, a $6 replacement restores full flow. Our complete faucet aerator guide covers thread sizes (regular vs. junior, male vs. female) so you buy the one that actually fits. And if the flow feels weak everywhere and the aerator’s clean, the flow restrictor inside the spray head may be the issue — see how to do a kitchen faucet flow restrictor removal before you assume the whole faucet is shot.
Do I Need Special Tools for Kitchen Faucet Parts Replacement?
For most kitchen faucet parts replacement, no — you need an adjustable wrench, a set of hex keys, needle-nose pliers, and plumber’s silicone grease, plus maybe a basin wrench if you’re working deep under the sink. That’s a $30 kit total, and you likely own most of it already. A cartridge puller ($10) is the one specialty tool worth buying if your old cartridge is scaled in and won’t budge.
If you’re building out your under-sink toolkit from scratch or planning a bigger job, our rundown of the sink faucet install tools you actually need lists exactly what earns its place in the drawer and what’s overkill.
When Is Replacing Parts Not Worth It — Should I Just Buy a New Faucet?
Replace the whole faucet instead of the parts when the body is cracked or corroded through, when the finish is flaking off, when the manufacturer no longer sells the cartridge for your model, or when you’d be sinking $40+ in parts into a faucet that already cost $60 new. At that point a new faucet with a fresh warranty is the better value — and a better use of your afternoon.
Rules of thumb worth applying:
- Parts unavailable = replace. If the brand is defunct or discontinued the cartridge, you can’t reliably fix it. This is the #1 reason to upgrade.
- Repeat repairs = replace. Fixed the same leak twice in a year? The faucet is telling you something.
- Cost creeps past ~40% of a new unit = replace. A $35 cartridge plus a $25 spray head on an $80 faucet is a coin flip; put it toward new.
- You want new features anyway. If you’ve been eyeing a pull-down or touchless model, a failed part is a fine excuse. See the best smart touchless kitchen faucet options for 2026 if hands-free is on your list.
- Body is solid, part is available = repair. A quality brass-body faucet is worth keeping alive for a decade of cheap part swaps.
And if you do decide to swap the whole unit, it’s genuinely a doable afternoon project — our step-by-step on how to install a kitchen sink faucet and drain yourself covers the full removal-and-reinstall so you’re not paying $150 in labor for an hour of work.
How Long Do Kitchen Faucet Parts Actually Last?
With average household use and reasonable water quality, ceramic-disc cartridges last 5–15 years, O-rings and seals 3–7 years, aerators 1–3 years before they need a vinegar soak or swap, and pull-down hoses 5–10 years. Hard water is the great accelerator — heavy mineral content can cut those numbers in half by scaling up the discs and clogging the aerator screen far faster.
Three things extend part life more than anything else:
- Manage hard water. If you have visible white scale on fixtures, a whole-home softener or even periodic aerator cleaning dramatically slows cartridge wear.
- Don’t over-torque the handle. Cranking a faucet off hard grinds the ceramic discs; a firm, gentle close is all a good cartridge needs.
- Use silicone grease on seals. Every time you’re in there, a dab of plumber’s silicone on O-rings keeps them supple and sealing for years longer.
Buying quality parts matters here too. Genuine OEM cartridges and seals — or well-made aftermarket parts tested to the same standard — simply outlast the bargain-bin versions that dry out in two seasons.
Where Do I Find My Faucet’s Model Number to Order the Right Part?
Look for the model number etched into the underside of the spout, stamped on a tag on the supply lines, printed in the original manual, or on the box if you kept it. If it’s long gone, photograph the faucet and the handle/cartridge and match it to the manufacturer’s parts diagram online — the cartridge shape and clip style are usually enough to identify it.
This one step prevents the most common DIY failure: ordering a cartridge that’s almost right and won’t seat. When in doubt, pull the old part first and match it physically at the store or against the online diagram. Brand-name faucets (Moen, Delta, Kohler, and quality direct brands like Fransiton) publish part numbers precisely so you can self-service them for years — that serviceability is a feature, not an afterthought.
FAQ
Can I replace a kitchen faucet cartridge without turning off the main water?
Yes — you only need to close the two angle-stop shutoff valves directly under the sink, not the home’s main. Turn both clockwise until snug, open the faucet to relieve pressure and confirm the water’s off, then work. If the under-sink valves are seized or leak when closed, that’s your cue to shut the main and replace those valves too.
Are aftermarket kitchen faucet parts as good as OEM?
Quality aftermarket cartridges, O-rings, and aerators from reputable makers perform just as well and cost less, as long as they’re the correct spec for your faucet. The risk is cheap, unbranded parts with softer rubber or looser tolerances that fail early. Match the exact part number, and favor sellers who publish material and pressure ratings over the cheapest listing.
Why does my kitchen faucet still drip after I replaced the cartridge?
Usually one of three things: the new cartridge is the wrong model, it’s not seated in the correct keyed orientation, or debris got trapped on the seat when you reassembled. Pull it, confirm the part number, flush the valve body with the water briefly, re-grease the O-rings, and reseat it fully. On two-handle faucets, also check the seats and springs beneath the cartridge.
How much does professional kitchen faucet parts replacement cost versus DIY?
A plumber typically charges $100–$250 for a cartridge or hose replacement once you add a service-call minimum and labor, while the DIY part itself runs $8–$40. For a straightforward cartridge, O-ring, or aerator swap, DIY saves the most and takes under an hour. Save the pro for corroded valves, seized shutoffs, or in-wall plumbing.
Is it worth repairing a faucet that’s more than 10 years old?
If it’s a solid brass-body faucet, the finish is intact, and the parts are still sold — yes, a $15 repair beats a $200 replacement. If the body is corroding, the finish is peeling, or the manufacturer has discontinued the cartridge, put the money toward a new faucet with a fresh limited-lifetime warranty instead.
What’s the difference between a cartridge and a diverter, and can they fail at the same time?
The cartridge controls temperature and shutoff; the diverter routes water between the main spout and the pull-down spray. They’re separate parts and can absolutely fail independently — a bad cartridge drips or won’t shut off, while a bad diverter leaks water from both outlets at once or weakens the spray. Diagnose by symptom and replace only the one that’s failing.
Author note: This guide was written by the Fransiton fixtures team — plumbers and product engineers who design, bench-test, and service kitchen and bath faucets every day. Fransiton manufactures faucets and replacement parts built to ceramic-disc valve standards and pressure-tested before shipping, and we back our fixtures with a limited-lifetime warranty on the finish and function. We believe a good faucet should be serviceable for a decade, which is exactly why we publish part numbers and diagrams for every model.