If you’ve ever knelt down, looked up under a sink, and wondered which sink faucet install tools you’ll actually use versus which ones the hardware store just wants to sell you, this is the honest answer. Replacing a kitchen or bathroom faucet is one of the most beginner-friendly plumbing jobs there is — no soldering, no cutting pipe, usually 45 to 90 minutes — but the whole job lives or dies on reaching a few nuts jammed into a space the size of a shoebox. The right tools turn a frustrating afternoon into a quick swap. The wrong (or missing) tools are why people give up and call a plumber for a $150 service call they didn’t need.
Below is exactly what to buy, what each tool does, what you can skip, and how to handle the two or three spots where DIYers almost always get stuck.
What’s the minimum tool list to install a sink faucet at home?
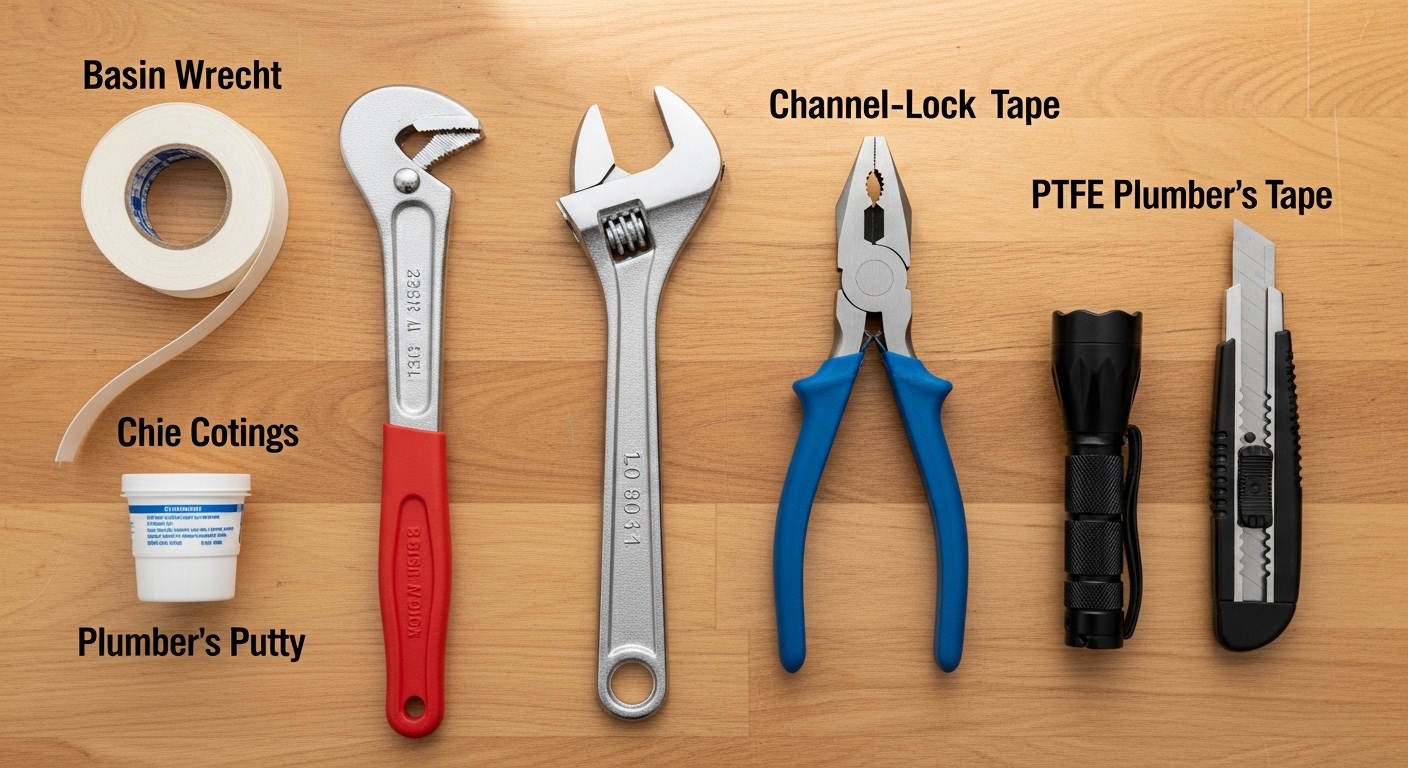
The minimum kit is six items: a basin wrench, an adjustable (crescent) wrench, tongue-and-groove (channel-lock) pliers, plumber’s tape, plumber’s putty or silicone, and a bucket with towels. With just those, you can complete roughly 90% of standard deck-mounted faucet installs — kitchen or bathroom. Everything else is a “nice to have” that makes a specific step easier.
Here’s why each one earns its spot in the kit:
- Basin wrench — the single most important tool. Its long shaft and pivoting, spring-loaded jaw reach up behind the sink basin to grab the mounting nuts and supply-line nuts you physically cannot reach with a normal wrench. If you buy only one specialty tool, buy this.
- Adjustable wrench (8–10 inch) — for the supply-line connections and shut-off valve nuts you can reach from the front or side.
- Channel-lock / tongue-and-groove pliers — grip, twist, and hold stubborn nuts, and back off a corroded fitting the basin wrench can’t crack loose.
- PTFE plumber’s tape — wrapped around threaded connections to seal them. Cheap insurance against slow drips.
- Plumber’s putty or 100% silicone sealant — seals the base of the faucet or the drain flange to the sink deck so water doesn’t seep underneath.
- Bucket + towels — the lines and the P-trap still hold water even after you shut the valves. Something always drips.
Add a flashlight or headlamp (a headlamp is better — it keeps both hands free), a utility knife for scoring old caulk or putty, and a roll of paper towels, and you have a professional-grade faucet kit for well under $60.
What is a basin wrench, and do I really need one for a faucet install?
Yes — for most under-sink installs, a basin wrench is close to non-negotiable. It’s a long-handled tool (usually 10–17 inches) with a self-adjusting, spring-loaded jaw at the top that swivels 90 degrees, letting you reach up into the cramped gap behind the sink basin and turn the mounting nuts that hold the faucet down. A normal wrench simply won’t fit or turn in that space.
The reason this tool exists is geometry. Faucet mounting nuts sit directly above the back edge of the sink, buried between the basin and the wall, often 8–14 inches up from where your face is. There’s no straight-on angle. The basin wrench’s pivoting head lets you apply torque from below at an awkward angle, and you flip the jaw to switch between loosening and tightening. Once you’ve used one, you’ll never try to do a faucet without it again.
A quick tip most people learn the hard way: the jaw is directional. If it’s slipping instead of gripping, you’ve got it flipped for the wrong direction — pull the pin (or squeeze the head) and reverse the jaw so the teeth bite as you turn.
Do I need special tools for a bathroom faucet vs. a kitchen faucet?
Mostly no — the core kit is the same for both. The differences are in reach and in the extra parts. Kitchen faucets tend to have deeper cabinets and, if it’s a pull-down sprayer model, a hose and weight to route. Bathroom faucets usually add a drain assembly (the pop-up) that you’ll also set with putty or silicone. So the tools overlap almost entirely; only a couple of situational add-ons change.
| Tool | What it does | Kitchen | Bathroom |
|---|---|---|---|
| Basin wrench | Turns deep mounting & supply nuts | Essential | Essential |
| Adjustable wrench | Supply lines, valve nuts | Essential | Essential |
| Channel-lock pliers | Grip/loosen stubborn fittings | Essential | Essential |
| Plumber’s tape (PTFE) | Seals threaded joints | Essential | Essential |
| Plumber’s putty / silicone | Seals base & drain flange | Recommended | Essential (drain) |
| Bucket + towels | Catches residual water | Essential | Essential |
| Basin wrench extension / Faucet & Sink Installer | Reaches extra-deep nuts | Helpful | Sometimes |
| Bucket of patience for the sprayer hose | Route pull-down hose & weight | Helpful | N/A |
One thing worth knowing before you start either job: check how many mounting holes your sink has and how many your new faucet needs. If your faucet is single-hole and your sink has three, you may want a deck plate (escutcheon) to cover the extras. We break that down in our guide to what a bathroom faucet deck plate is and whether you actually need one — worth a two-minute read before you buy, because it changes what parts you’ll need on install day.
Is a basin wrench enough, or do I need a “faucet installer” tool too?
A basin wrench is enough for the vast majority of installs. The all-in-one “Faucet & Sink Installer” tool (that stubby blue or orange multi-socket wrench) is a convenience, not a requirement — it shines in extra-tight cabinets and on plastic mounting nuts, where its multiple built-in sockets grab faster than a basin wrench’s jaw. But it can’t do everything a basin wrench does, so think of it as a supplement.
Here’s how to decide:
- Buy just a basin wrench if you’re doing one standard install and want the most versatile single tool.
- Add a Faucet & Sink Installer if your faucet uses those wide plastic quick-mount nuts (common on modern kitchen faucets), or if the cabinet is so shallow the basin wrench can’t swing.
- Get a basin wrench with a telescoping/extension shaft if you have a deep vanity or a farmhouse sink where the nuts sit far up and back.
Speaking of sink shape driving your tools: apron-front and farmhouse sinks change the reach and sometimes the number of faucet holes you’re working with. If that’s your setup, our piece on choosing a farmhouse-style kitchen sink faucet for an apron-front sink will help you match the faucet (and therefore the mounting hardware) to the sink before tools ever enter the picture.
What supplies — not just tools — do I need on install day?
Beyond tools, plan on a handful of consumables and small parts: PTFE tape, plumber’s putty or silicone, new braided stainless supply lines, and possibly new shut-off valves. The tools do the work, but a leak-free install depends just as much on these cheap consumables, and running out mid-job means a second trip to the store with the water still off.
A realistic shopping list looks like this:
- Braided stainless-steel supply lines — always replace the old ones. They’re a few dollars each, and a 10-year-old rubber line is a flood waiting to happen. Match the length and the connection sizes (commonly 3/8″ compression at the valve, 1/2″ at the faucet).
- PTFE plumber’s tape — wrap threads 3–4 times, clockwise, in the direction the nut tightens.
- Plumber’s putty or 100% silicone — putty for drain flanges and traditional deck seals; silicone where the manufacturer specifies it (some finishes and stone countertops require silicone, not putty).
- New shut-off (angle) valves — optional, but if your current valves are seized or weep when you turn them, replace them while everything’s apart.
- A faucet supply line coupling — if your new supply lines don’t match your valve or faucet threads. Our guide to what a faucet supply line coupling is and which one to buy covers exactly how to size these so you don’t guess.
One more overlooked item: a small container of penetrating oil. If your shut-off valve nuts or old mounting nuts are corroded, a spritz and a five-minute wait can save you from rounding off a nut and turning a simple swap into a much bigger job.
How do the tools actually get used, step by step?
The tools map to a simple sequence: shut off water and drain the lines, disconnect the old faucet from below, clean the deck, set and secure the new faucet, then reconnect and test. Knowing which tool comes out at each step is what keeps the job smooth. Here’s the flow.
- Shut off the water at the two angle valves under the sink (turn clockwise). Open the faucet to relieve pressure. Use your adjustable wrench only if a valve handle is stuck.
- Place your bucket and towels. Disconnect the supply lines from the valves with the adjustable wrench; water in the lines will drain out.
- Remove the old mounting nuts with the basin wrench, reaching up behind the basin. This is the slow part — go steady.
- Lift out the old faucet and scrape the old putty or caulk off the deck with your utility knife. A clean deck is what makes the new seal work.
- Set the new faucet, applying plumber’s putty or silicone at the base or gasket as the instructions direct.
- Tighten the new mounting nuts from below with the basin wrench or Faucet & Sink Installer — snug and even, not gorilla-tight.
- Connect the new supply lines, wrapping threads with PTFE tape, and tighten with the adjustable wrench — firm plus about a quarter-turn, no more.
- Turn the water back on slowly, then check every joint with a dry paper towel. A dry towel shows the tiniest weep a glance would miss.
If you want the full walk-through with photos and torque tips, our step-by-step on how to install a kitchen faucet pairs perfectly with this tool list — read the two together and you’ll have both the “what to grab” and the “what to do” covered.
What goes wrong, and which tool saves you?
The three classic snags are corroded nuts that won’t budge, mounting nuts you can’t reach, and post-install drips. Each has a specific tool or trick, so you don’t have to improvise mid-job. Match the problem to the fix below.
| Problem | What’s happening | Tool / fix |
|---|---|---|
| Nut won’t loosen | Corrosion has frozen the threads | Penetrating oil + channel-lock pliers; wait 5–10 min |
| Can’t reach the nut | Deep cabinet or farmhouse sink | Basin wrench with extension shaft or Faucet & Sink Installer |
| Slow drip at supply line after install | Under- or over-tightened, or no tape | Re-seat with PTFE tape; snug with adjustable wrench |
| Water seeping under faucet base | Bad or missing base seal | Re-set with fresh plumber’s putty or silicone |
| Weak flow after new install | Debris in the aerator or restrictor | Unscrew and clean the aerator |
That last one surprises a lot of people: after any install, sediment loosened in the lines can clog the aerator and make a brand-new faucet feel weak. Run the faucet with the aerator removed for a few seconds to flush it. If flow still feels low, our guides on the faucet aerator and on kitchen faucet flow restrictor removal walk you through cleaning and, where allowed, adjusting for better pressure.
How much should the whole tool kit cost, and is it worth buying vs. renting?
A complete DIY faucet-install tool kit runs about $40–$70 and pays for itself on the first job. A single plumber visit to swap a faucet typically costs $120–$300 in labor alone, so buying the tools is almost always the smarter move if you’ll ever touch a faucet again — and you will, since aerators, cartridges, and supply lines all need occasional attention.
Rough budget:
- Basin wrench: $10–$20
- Adjustable wrench: $10–$15
- Channel-lock pliers: $12–$18
- PTFE tape + plumber’s putty: $6–$10 together
- Braided supply lines (pair): $8–$16
- Optional Faucet & Sink Installer tool: $10–$15
Renting isn’t really a thing for tools this cheap — you’d spend nearly the purchase price. Borrow a basin wrench from a neighbor if it’s genuinely one-and-done, but honestly, owning the kit means the next dripping faucet, loose handle, or aerator swap is a 20-minute job instead of a service call.
FAQ
Can I install a sink faucet without a basin wrench?
Sometimes, but it’s much harder. On a few faucets — especially those with modern plastic quick-connect mounting nuts you can turn by hand — you can skip it. But for standard brass mounting nuts tucked behind the basin, a basin wrench (or a Faucet & Sink Installer tool) is the only practical way to reach and turn them. Trying with regular pliers usually ends in skinned knuckles and a half-tightened faucet.
Do I use plumber’s tape or plumber’s putty — what’s the difference?
They do different jobs, so you often need both. PTFE plumber’s tape seals threaded pipe connections (like supply lines) against pressurized leaks. Plumber’s putty (or silicone) creates a watertight seal between two flat surfaces that aren’t under pressure — like the faucet base or the drain flange against the sink deck. Never substitute one for the other.
How long does it take to install a sink faucet yourself?
For a first-timer with the right tools, budget 45–90 minutes. An experienced DIYer can do a straightforward swap in 30–45 minutes. Most of the time goes into two things: getting the basin wrench onto tight mounting nuts, and cleaning old putty off the deck. Corroded shut-off valves are the main thing that can stretch the job longer.
Should I replace the supply lines when I change a faucet?
Yes, essentially always. New braided stainless-steel supply lines cost only a few dollars and are the single cheapest insurance against a future flood. Reusing old, kinked, or rubber lines is a common cause of leaks that show up weeks after an otherwise perfect install. Match the length and thread sizes, and use PTFE tape on threaded ends.
How tight should I make the connections so they don’t leak?
Snug, not brutal. For threaded supply-line nuts, hand-tighten first, then add about a quarter-turn with your adjustable wrench — over-tightening cracks fittings and crushes washers, which actually causes leaks. For mounting nuts, tighten until the faucet is firm and won’t rotate, then stop. After the water’s back on, check with a dry paper towel and only tighten a hair more if you see moisture.
What if my shut-off valve leaks or won’t turn?
If the valve is seized or weeps when you operate it, replace it while you have everything apart — it’s a common upgrade during a faucet swap. Shut the main water supply, then swap the old angle valve for a new quarter-turn valve using your adjustable wrench and PTFE tape. If you’re not comfortable working at the valve, that’s the one point where calling a plumber for just that step is reasonable.
Author note: This guide was written by the Fransiton fixtures team, drawing on hands-on installs across kitchen and bathroom faucets and the questions our customers actually ask before their first DIY swap. Fransiton designs and sells faucets and bathroom fixtures direct to homeowners, and our products are built to standard North American mounting and connection specs (standard 1/2″ and 3/8″ supply threads, common 1–3 hole deck configurations) so they work with the everyday tools above. Our faucets are tested to industry durability and lead-safe standards and backed by a manufacturer’s warranty — always follow the instructions and torque guidance in your specific faucet’s manual, since sealant type and tightening specs can vary by finish and countertop material.
Pingback: How Do You Install a Delta Shower Faucet Valve the Right Way? - Fransiton